All features
Every feature, down to the slider.
The complete list of what masoc does on iPhone, iPad and Mac: every tool, every slider with its range, and the details in between.
20 groups and 182 entries, checked against the app in October 2026.
Editing basics
One editor on every device, with sliders that show their real values.
- Five tabs
- Light, Color, Effects, Looks and Tools sit in one row, in the same place on iPhone, iPad and Mac.
- Groups
- Light holds Basic and Tone Curve. Color holds Basic, Color Mixer, Grading and Calibration. Effects holds Texture, Atmosphere, Grain, Sharpen, Noise and Lens.
- Seven tools
- Masks, Crop, Blur, Smart Edit, Frames, Retouch and Censor, each one tap away under Tools.
- Precision sliders
- Every slider shows its real value. Most run from −100 to +100 in whole steps, with a haptic tick at every step, at the default and at both ends.
- Fine control
- Move your finger up or down while you drag, and the slider slows down in three stages, for the smallest changes.
- Exact values
- Press and hold a slider’s value to type an exact number. The field shows the slider’s range.
- Quick reset
- Double-tap a slider to reset it. A reset arrow appears beside the name of every slider you have moved.
- Zoom
- Pinch and pan at the same time, up to 16 times. The part you zoom into is drawn in full detail.
- Immersive mode
- On iPhone and iPad, tap the photo to clear the bars away and let it fill the screen. Settings can make every photo open this way.
- Title pages
- Tap the title in the editor to step through file, camera, exposure, size and a live histogram. Pick and order the pages in Settings › Editing.
- Grouped adjustments
- On iPhone, each tab splits into smaller groups you scroll between. Turn it off for one long list.
- Non-destructive
- Your original file is never changed. Edits are saved separately, so you can change, copy or reset them at any time.
More about how masoc is designed
Light
From the deepest black to the brightest white.
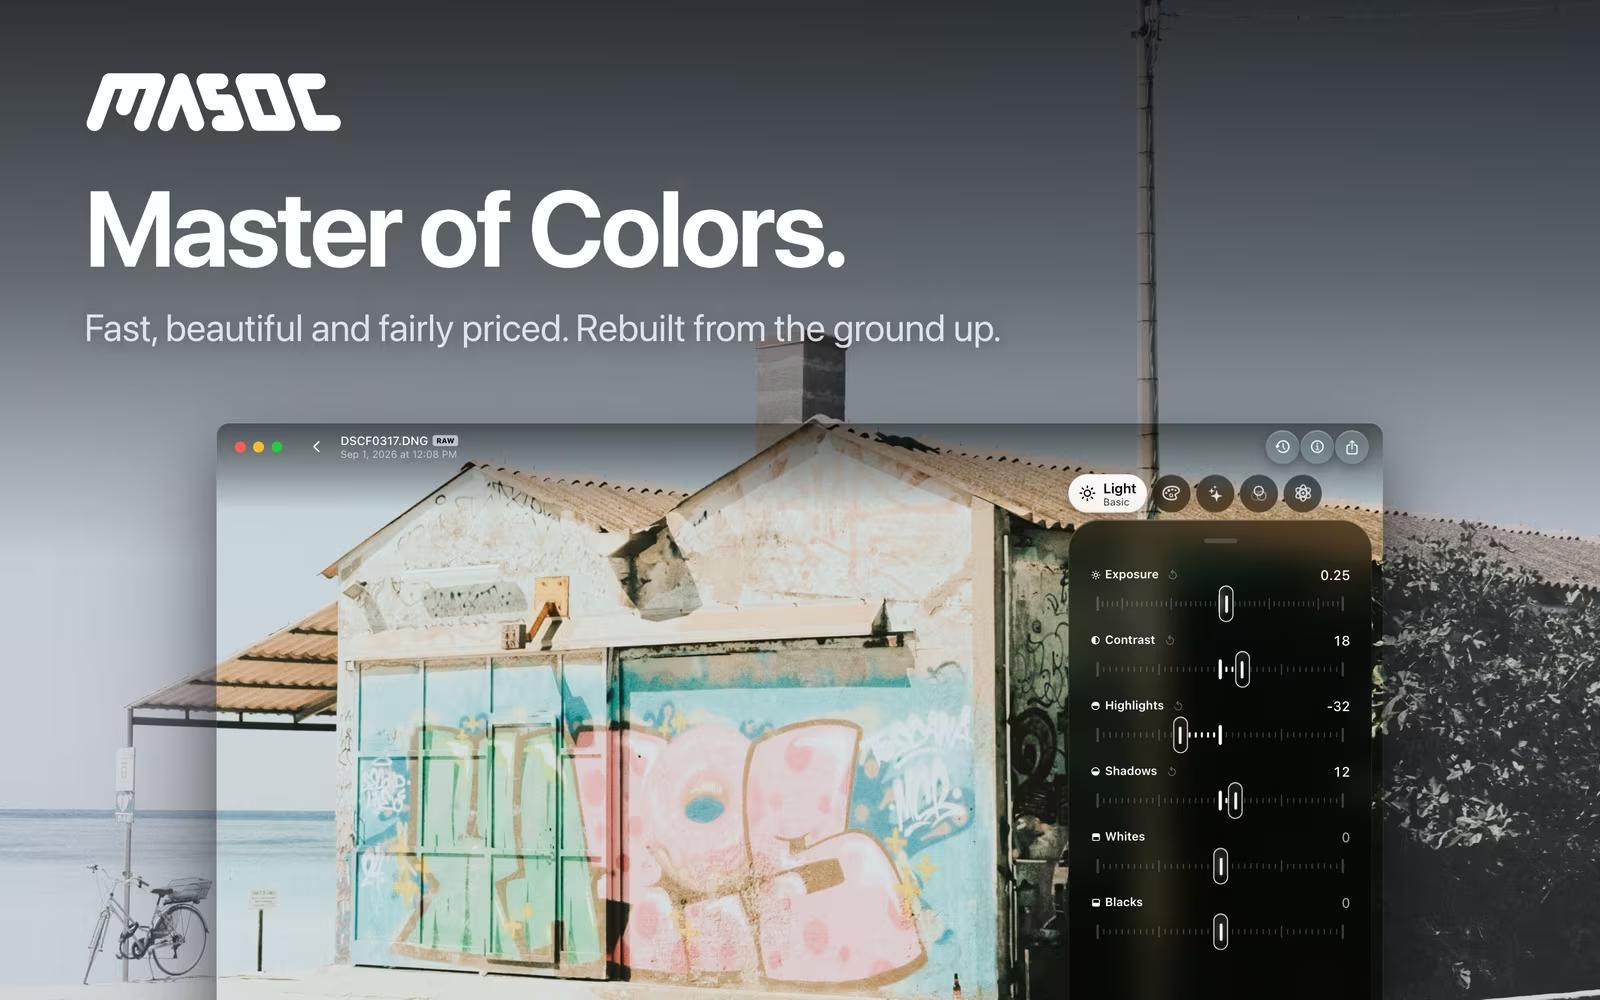
- Exposure
- −5 to +5 EV in steps of 0.05. It lifts the midtones most and eases off toward white.
- Contrast
- −100 to +100.
- Highlights and Shadows
- −100 to +100 each. They work on areas, not single tones, so a bright sky comes down and dark corners open up.
- Whites and Blacks
- −100 to +100 each, for the two ends of the tonal range.
- Tone curve
- Free points on RGB, red, green and blue. Tap to add a point, drag to move it, double-tap to remove it. The end points move up and down.
- A curve that holds
- The curve is a smooth spline that never folds back on itself. While you drag, the point reads as input → output from 0 to 255.
- Curve reset
- Each channel resets on its own, so a red curve can go while the RGB curve stays.
Color
White balance in Kelvin, eight color bands and grading for every tone.
- Kelvin on RAW
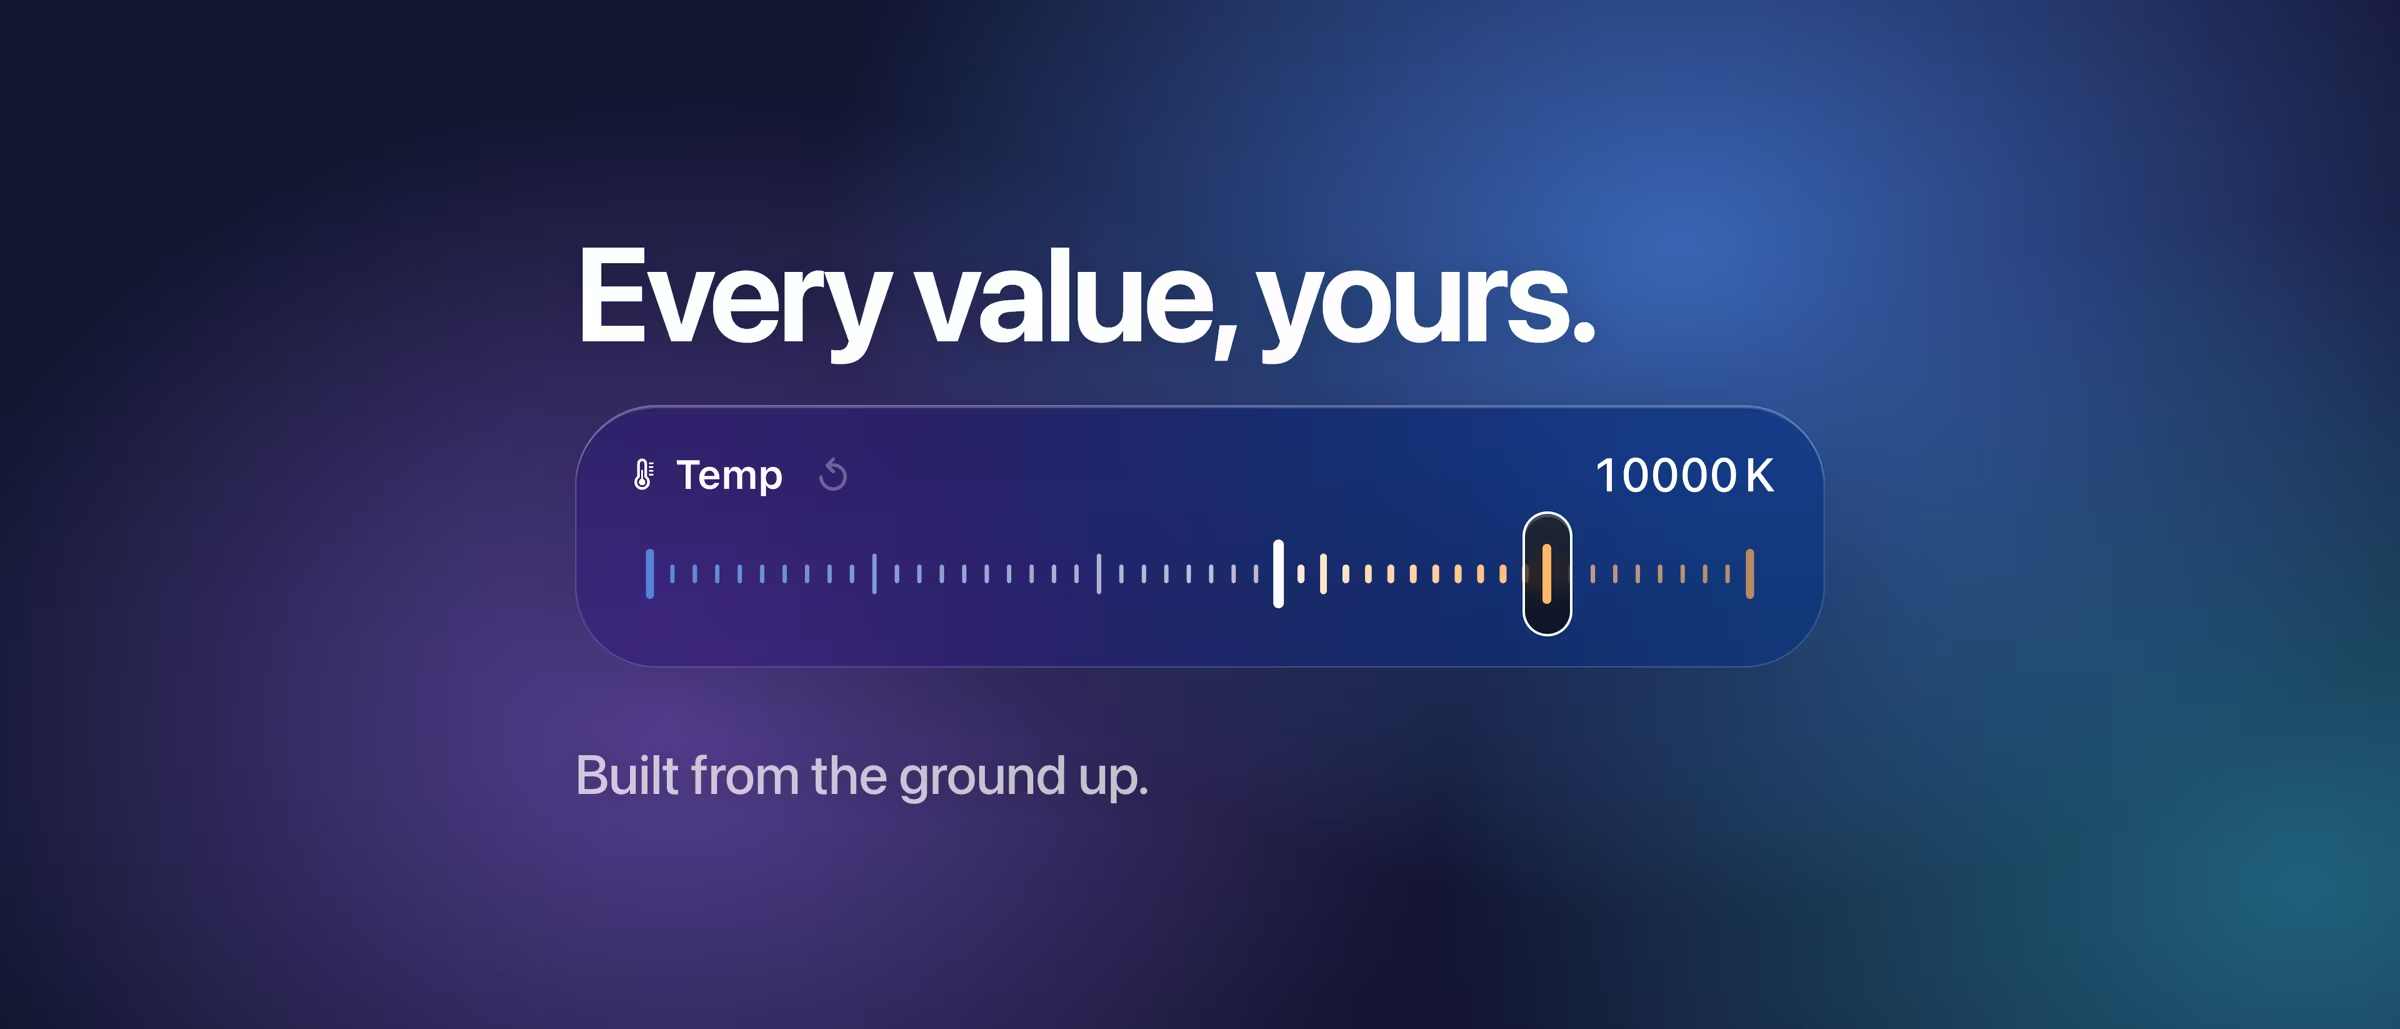
- Temperature from 2,000 to 100,000 K on a perceptually even scale, starting from the camera’s As Shot value. Tint from −150 to +150.
- White balance presets
- As Shot, Auto, Daylight, Cloudy, Shade, Tungsten, Fluorescent, Flash and Custom on RAW. As Shot, Auto and Custom on JPEG and HEIC.
- Auto
- Evens out the colors of the whole photo in one tap.
- Neutral picker
- Drag a crosshair over something that should be gray, watch the photo change live, then apply or cancel.
- JPEG and HEIC
- Temperature and tint shift relatively, from −100 to +100.
- Vibrance and Saturation
- −100 to +100 each.
- Color Mixer
- Hue, saturation and luminance for eight bands: red, orange, yellow, green, aqua, blue, purple and magenta. A dot marks every band you changed.
- Hue Shift
- Turns every color around the color wheel, from −180° to +180°.
- Color Grading
- Tint the shadows, midtones, highlights or the whole photo, each with a hue from 0 to 360° and a saturation from 0 to 100.
- Calibration
- Shadow tint, plus hue and saturation of the red, green and blue primaries.
Effects & detail
Texture, atmosphere, grain, sharpening, noise and lens corrections.
- Texture, Clarity, Structure
- −100 to +100 each, from the finest surface detail to broader local contrast.
- Dehaze
- −100 to +100. Cuts through haze, or adds some.
- Glow
- 0 to 100. A soft bloom around the bright parts of the photo.
- Vignette
- −100 to +100. Darkens or lightens the corners of the cropped photo.
- Grain
- Amount from 0 to 100, with Size and Roughness to shape it.
- Sharpen
- Sharpness from 0 to 100, Radius from 0.5 to 3, Detail and Masking from 0 to 100.
- Noise reduction
- Luminance with Detail and Contrast, Color with Color Detail and Smoothness, each from 0 to 100.
- Lens corrections
- Vignetting and Chromatic Aberration from −100 to +100, Defringe for purple and green fringes from 0 to 100. Set by hand, so they work with any lens.
Masks
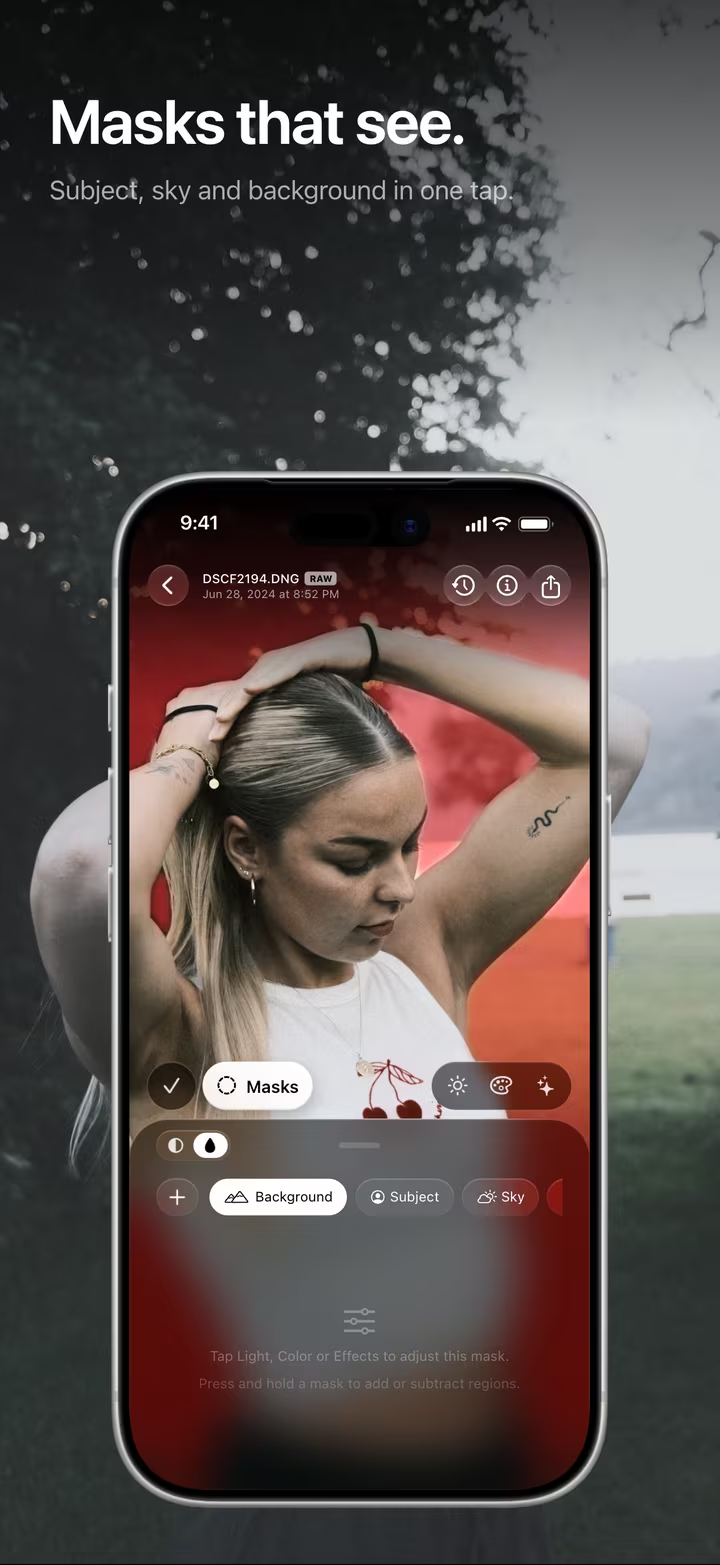
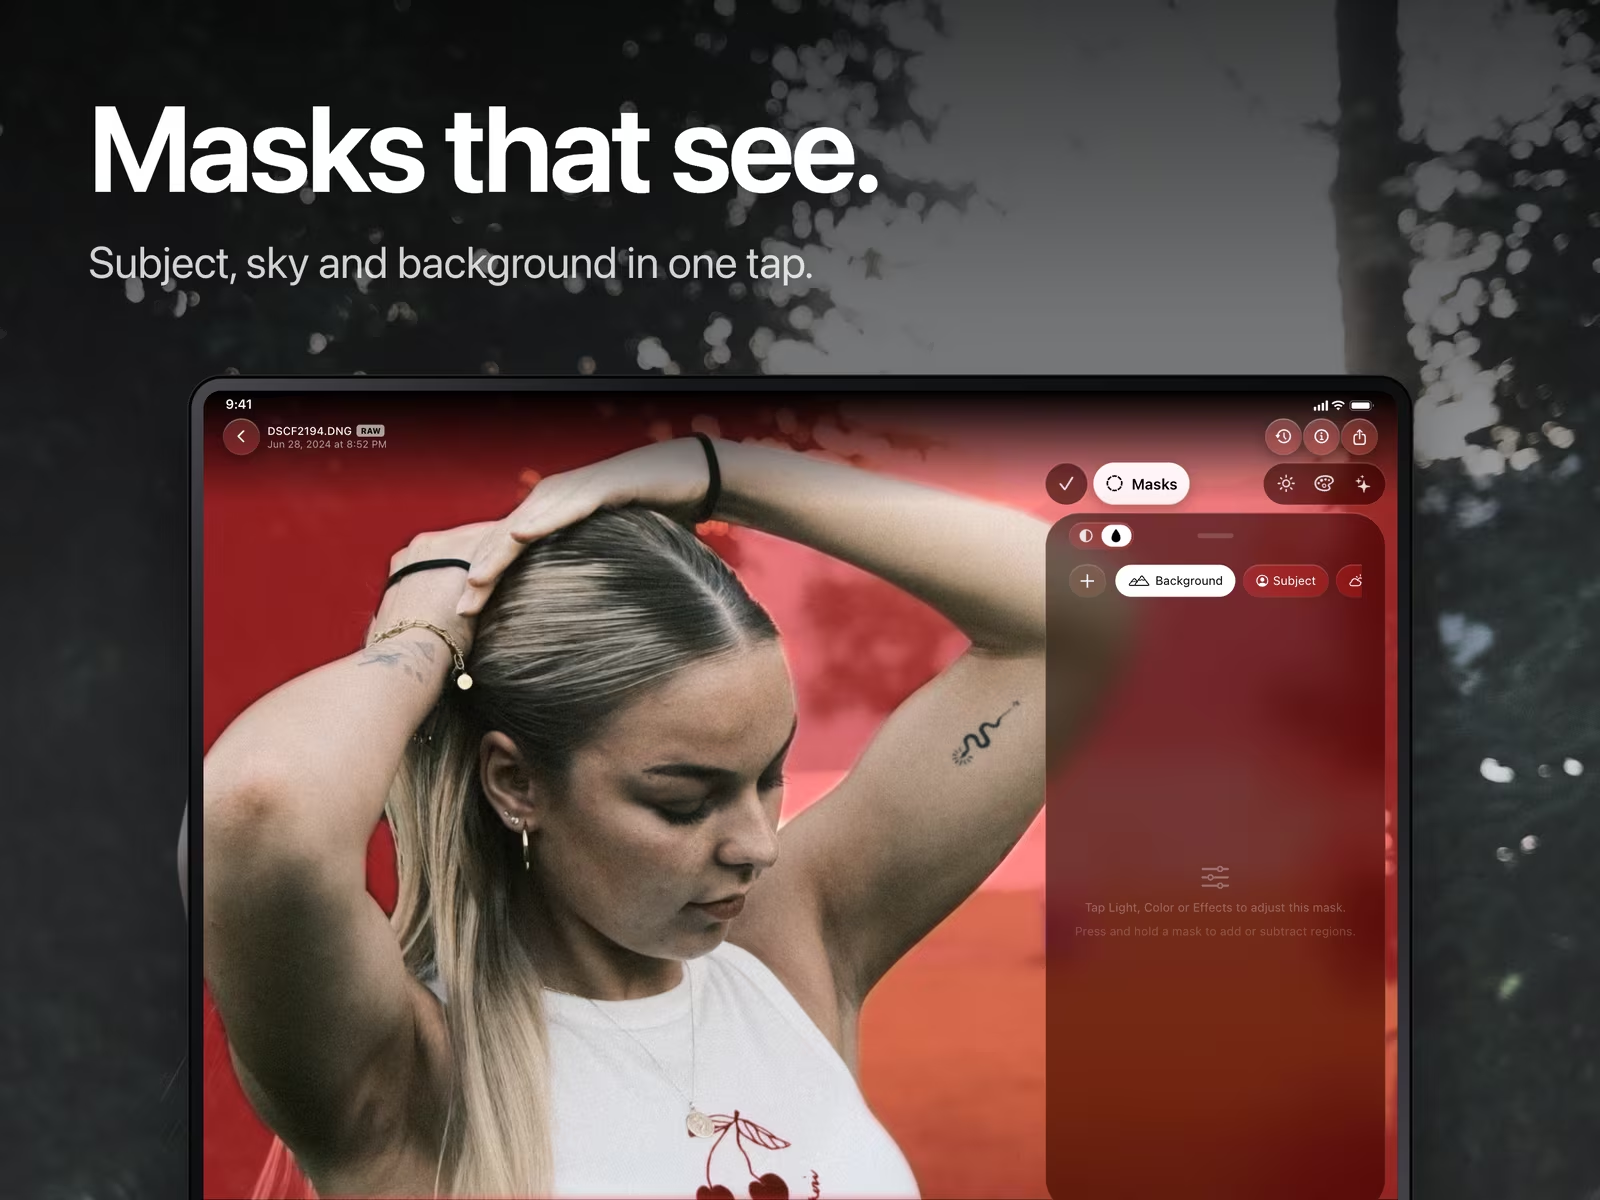
Subject, sky and background in one tap, plus masks you draw yourself.
- Subject and Background
- Found on your device with Apple’s Vision framework. Background is the subject turned inside out.
- Sky
- Two models built into masoc reach in between leaves and branches. A photo without a sky says so instead of guessing.
- Linear and Radial
- Gradients you drag onto the photo, each with a feather from 0 to 100.
- Brush
- Size, Feather and Flow. It erases as easily as it paints.
- Several masks
- Give one photo as many masks as it needs, each with its own sliders.
- Add and subtract
- A mask is a chain: add or subtract regions, AI or drawn. Press and hold a mask to add a region.
- Every part
- Invert or hide each part, or switch it between add and subtract. Tap a part to see it on its own for a moment.
- Opacity and overlay
- Each mask has an opacity from 0 to 100 percent and inverts in one tap. A red overlay shows where it acts.
- Inside a mask
- Exposure, contrast, highlights, shadows, whites, blacks, temperature, tint, vibrance, saturation, texture, clarity, structure, dehaze, glow, vignette, grain, sharpening and noise reduction.
- Masks that stay put
- Masks are anchored to the original photo, so they stay on the subject when you crop, straighten or rotate.
- Reuse
- Paste masks onto other photos, and subject, sky and background are found again on each one. Linear and radial masks travel in Lightroom presets.
Retouch
Paint over what should go.
- Remove
- Paint over an object, and a model on your device fills the area. A tap removes a small spot.
- Heal
- Paint over a blemish: texture comes from nearby, color and light from around it.
- Clone
- Copies a nearby area exactly. Drag the dashed outline to copy from somewhere else.
- Brush
- Size, Feather and Opacity. Zoom in for a finer brush.
- Variations
- Not right yet? Step through other fills, or the next best source area.
- Every spot
- Each spot keeps its own feather, opacity and variation, and can be deleted on its own.
- Anchored
- Spots live on the original photo, so a later crop or rotation never moves them.
Background blur
Depth from a single photo, and the focus wherever you tap.
- Depth from one photo
- A depth model on your device reads depth from the pixels alone. Depth from Portrait mode is used when a photo has it.
- Tap to focus
- The focus starts on the subject. Tap anywhere to make that depth sharp, or tap Focus on Subject to go back.
- Blur
- 0 to 100. It scales with the photo, so it looks the same at any size.
- Focus Range
- 0 to 100, from a thin slice of sharpness to the whole scene.
- Built in layers
- The photo is split by depth, and each band gets a round blur. Small lights open into discs, and the subject stays sharp from head to toe.
- Full quality
- The export renders at full resolution, and the area in focus keeps its original pixels.
Censor
Hide faces, license plates and text before you share.
- Shapes
- Draw a rectangle or an ellipse, or paint with a brush. A tap drops one.
- Covers
- Pixelate or Blur with a strength from 0 to 100, or a solid Fill.
- Fill color
- White, black, any color you pick, or one taken from the photo with a magnifying loupe.
- Every area
- Each area keeps its own cover. Drag it to move, pull the corners to stretch, turn it with the knob.
- Built to hide
- masoc warns when a mild cover over text could be undone, and the export sheet tells you that Original skips every edit.
- Anchored
- Areas live on the original photo, so a crop or rotation keeps them over what they hide.
Crop, geometry & optics
Frame, straighten and correct the lines.
- Aspect ratios
- Free, Original, 1:1, 4:3, 3:2 and 16:9, each turnable to portrait.
- Straighten
- −45° to +45°.
- Rotate and flip
- Quarter turns left and right, flip horizontally and vertically.
- Perspective
- Vertical, Horizontal and Aspect from −100 to +100, Scale from 50 to 200 percent, X and Y Offset.
- Distortion
- −100 to +100, for barrel and pincushion distortion.
- Auto Upright
- One tap finds the lines in the photo and straightens tilted horizons and converging verticals.
- Edges
- Fill the frame, or keep the edges and see the whole corrected photo.
Frames
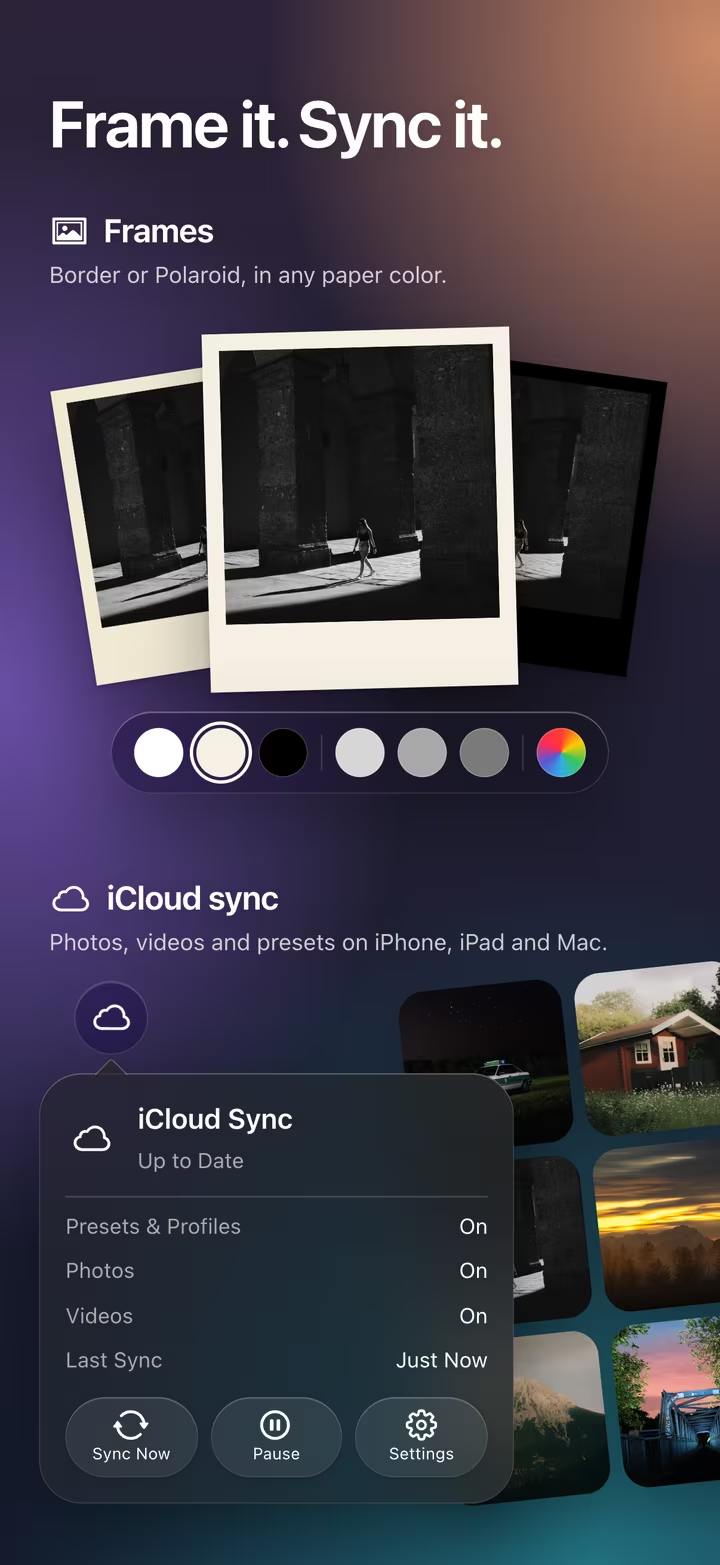
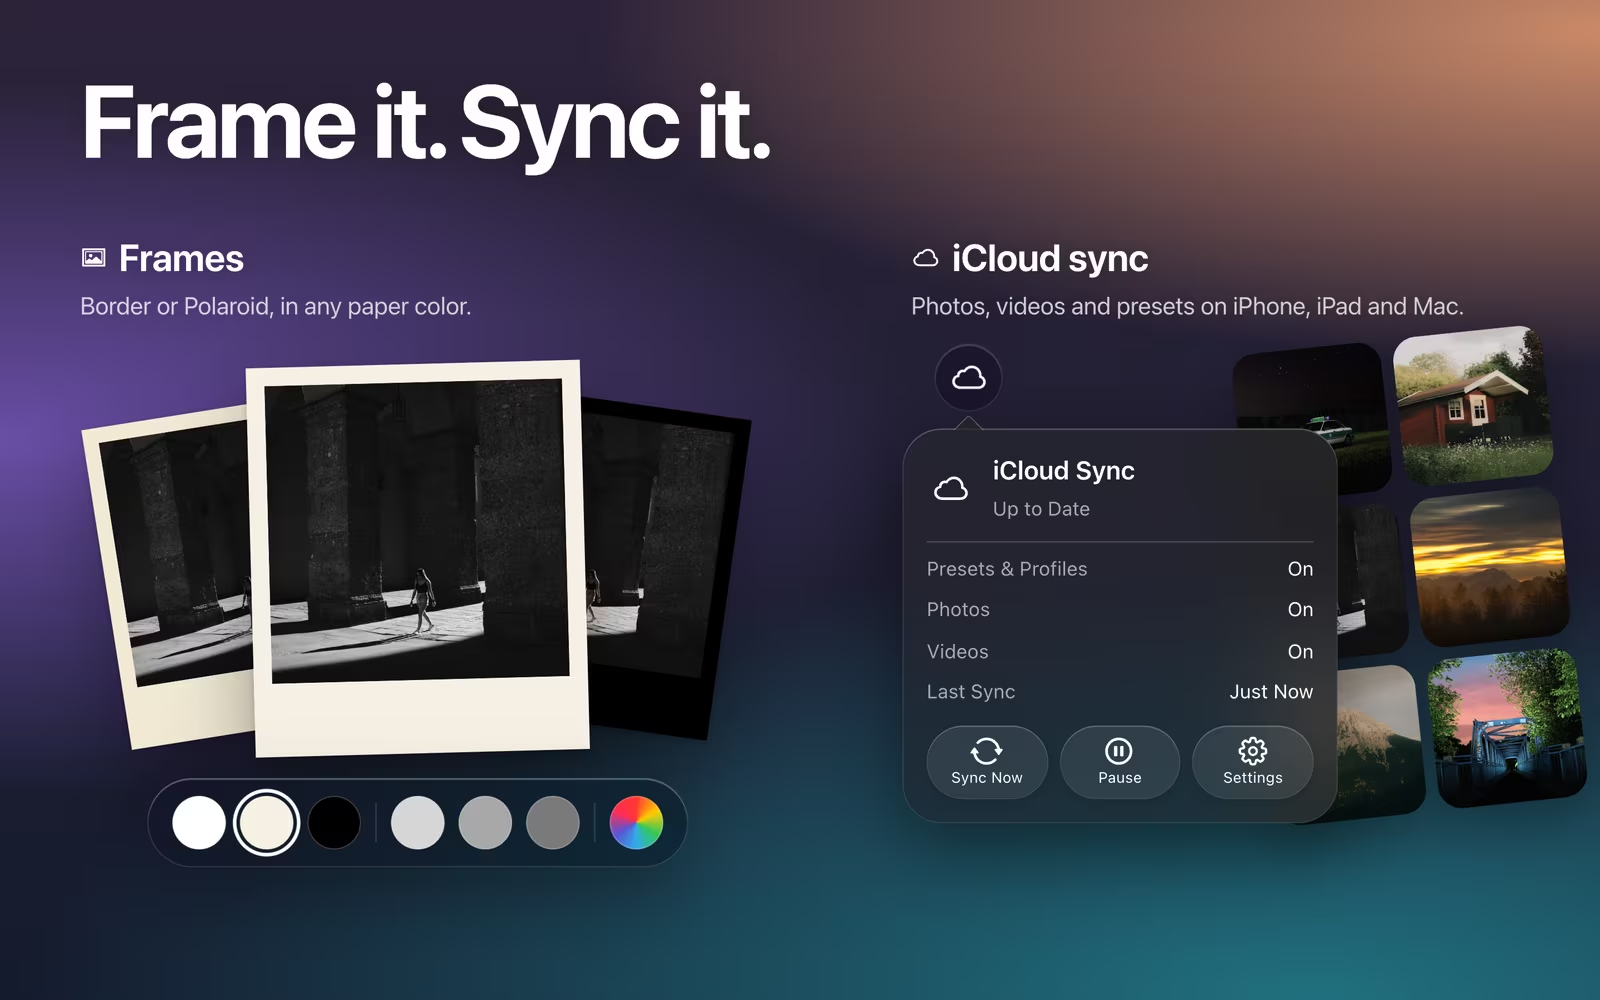
A border or a Polaroid, laid around the finished photo.
- Border
- An even edge in any format: Original, 1:1, 4:5, 3:4, 2:3 or 9:16, each turnable to landscape.
- Polaroid
- Instant film with a deep lower edge. The photo sits in a square window.
- Whole or filled
- Show the whole photo on the paper, or fill the window and cut the photo to it.
- Thickness and corners
- Thickness and Corner Radius from 0 to 100.
- Paper color
- White, Cream, Black, up to three soft tones taken from the photo, or any color you like.
- Position
- Drag the photo inside the frame, double-tap to center it.
Looks, profiles & presets
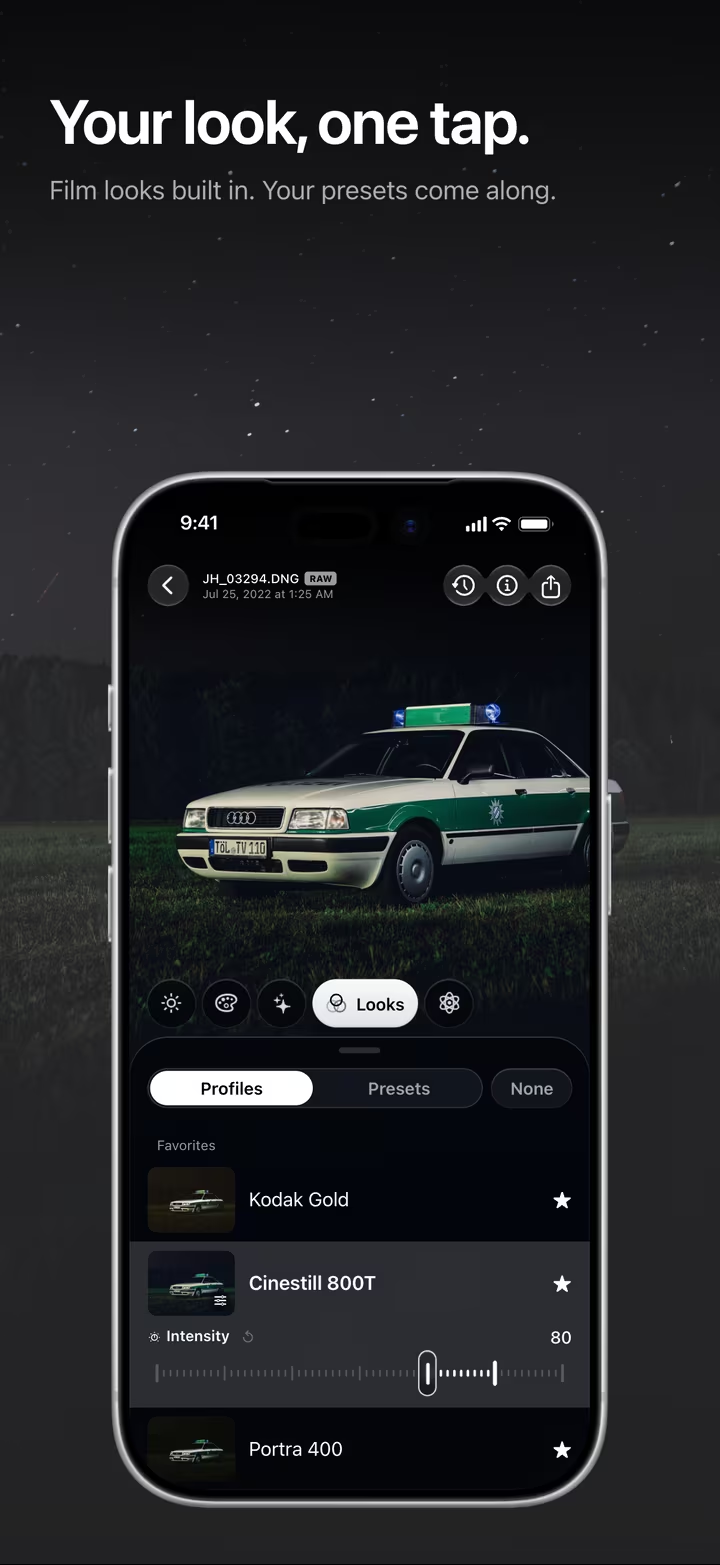
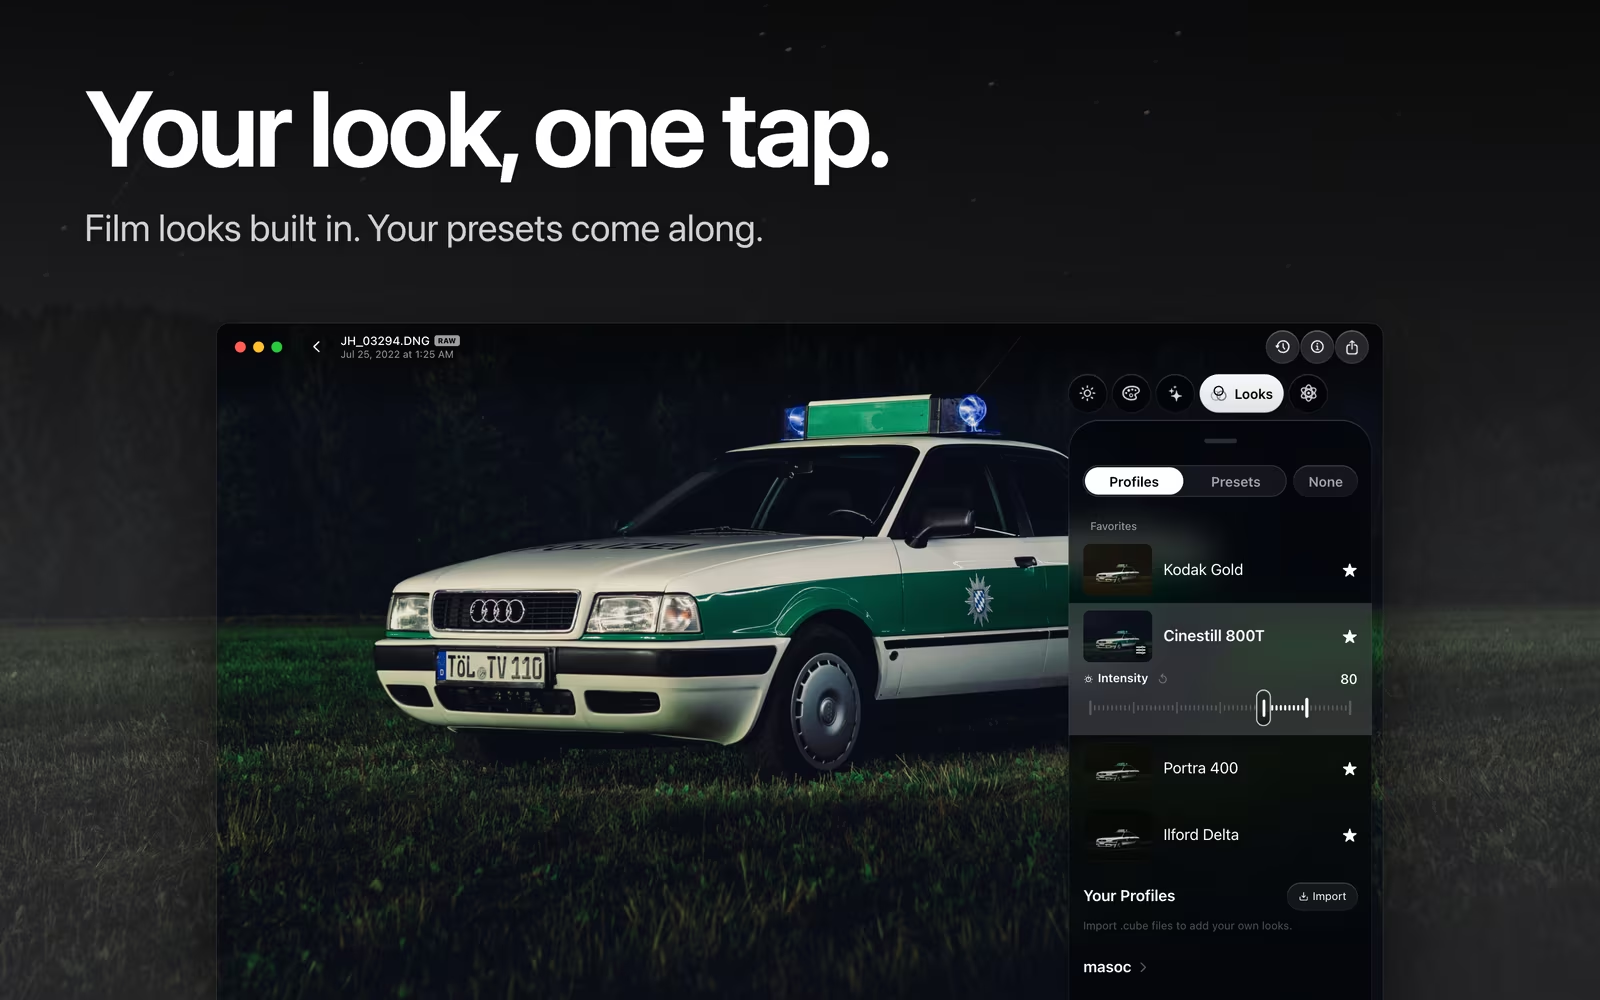
22 built-in looks, your own LUTs and your Lightroom presets.
- Fujifilm
- Provia, Astia, Classic Chrome, Classic Neg, Reala Ace, Eterna, Pro Neg Std and Acros.
- Film
- Portra 400, Kodak Gold, Cinestill 800T and Polaroid.
- Mono
- Ilford Delta and Ilford Delta Faded.
- Vintage
- Autochrome, Classic Cuban, Coffee and Summer Glow.
- Creative
- Cyberpunk, Infrared, Bark Morken and London.
- Intensity
- Every look from 0 to 120 percent, 100 by default.
- Favorites
- Mark the looks you use most, and they sit at the top.
- Hover preview
- On Mac and iPad, a look shows on your photo while the pointer rests on it. Click, and it stays.
- Your profiles
- Import .cube LUTs, one or several at once. They sit beside the built-in looks, on photos and video.
- Your presets
- Save an edit as a preset from the export sheet, with or without its masks, or overwrite an existing one.
- Lightroom presets in
- Open .xmp presets from Lightroom or Camera Raw. Each becomes a masoc preset.
- Lightroom presets out
- Export a preset as .xmp, with light, color, tone curve, HSL, color grading, detail, crop, LUT, and linear and radial masks.
- .masoc files
- Share a preset as a .masoc file, and open it on any device.
- Looks manager
- Rename, duplicate, delete and export presets and imported LUTs in one place, opened from the library.
- Look on import
- Pick a look in the import menu, and every photo of that import arrives with it.
Smart Edit
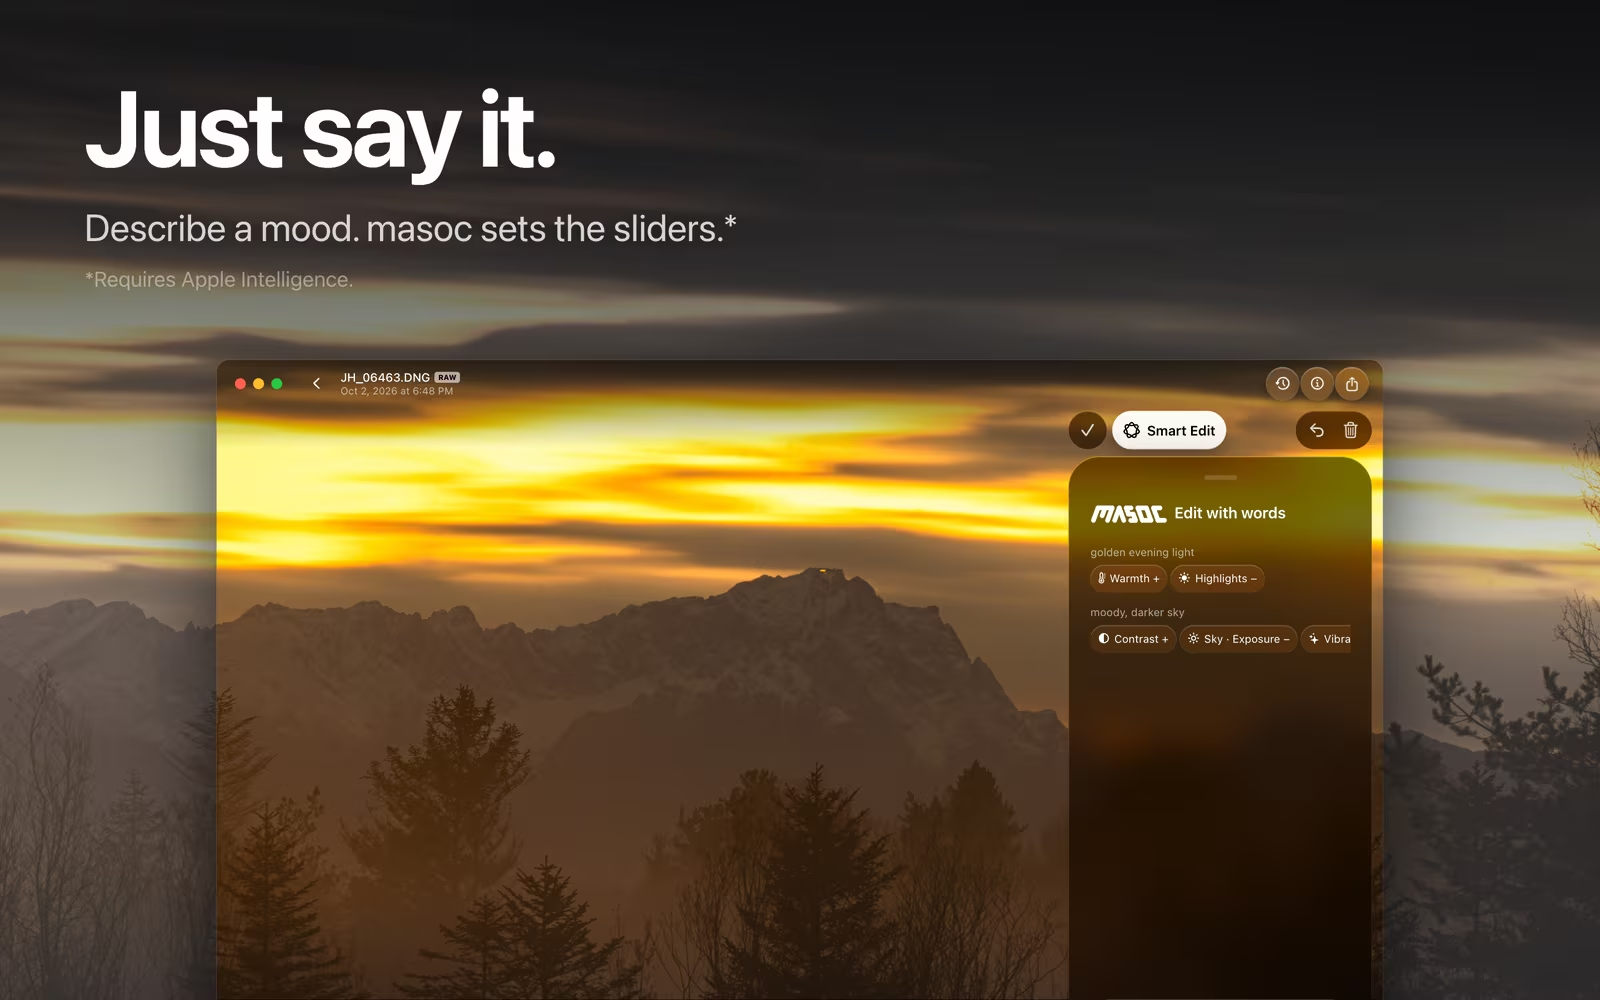
Say what you want. masoc sets the sliders.
- Type or speak
- Write in your own words, or tap the microphone. Speech is transcribed on your device, in the language it is set to.
- Only what you asked for
- masoc checks each suggestion against your words. Grain, glow, blur, a crop or a look only go on when you name them.
- Change chips
- Every change shows up as a chip. Tap it to open its slider, hold it to take back just that change.
- Undo
- Each request is one undo step, “undo that” works too, and Undo all Smart Edits returns to the start.
- Looks by name
- Name a built-in look, a preset or an imported LUT, with a strength in percent if you like, or describe a mood.
- Exact numbers
- “set contrast to 25” or “exposure -0.5” goes straight onto the slider.
- Masks and blur
- Ask for a darker sky, and Smart Edit can add a Sky mask with the change inside. “Blur the background” sets the blur.
- Requirement
- Runs with Apple Intelligence on your device, and appears once Apple Intelligence is on.
Panorama & HDR merge
Many frames, one photo, merged on your device.
- Start a merge
- Select two or more photos and tap Merge. masoc suggests Panorama or HDR from the exposures.
- Projection
- Spherical, cylindrical or perspective, with the field of view in degrees.
- Crop and Fill Edges
- The panorama starts at the largest rectangle without empty edges, or Fill Edges fills the corners with invented content.
- HDR
- Align lines up handheld frames. Deghost from Off to High holds moving things to the reference photo, and Ghosts shows where movement was found.
- Live preview
- See the result before you merge. Leave a photo out, or choose another as the reference.
- Warnings
- The studio tells you about mixed cameras or lenses, small exposure steps and photos taken more than 30 seconds apart.
- Developed like RAW
- The result is a new 16-bit floating-point OpenEXR photo that keeps the light above white. Your originals stay untouched.
- In the background
- The merge runs with the time left and a Cancel button, while the library stays free to use.
- Size
- Panoramas up to 80 megapixels on iPhone and iPad, 40 with 4 GB of memory, and 250 on Mac. HDR keeps the full size.
Video
The color tools of the photo editor, on every frame.
- Light and color
- Exposure to blacks, the tone curve, white balance, vibrance, saturation, the color mixer, color grading and calibration, live while the clip plays.
- Twelve Log profiles
- Apple Log, Apple Log 2, S-Log3 with S-Gamut3.Cine or S-Gamut3, F-Log, F-Log2, F-Log2 C, V-Log, Canon Log 3, N-Log, D-Log and ARRI LogC4.
- Log detection
- Apple Log, S-Log3 and D-Log are found on their own. For other cameras, pick the profile once, and masoc remembers the camera.
- Looks and LUTs
- Built-in looks, your .cube LUTs and your presets work on clips, with the same intensity slider.
- Crop
- Free, Original, 9:16, 4:5, 1:1, 16:9 or 2.39:1, quarter turns, flips and straightening up to 45° either way.
- Playback
- Scrub the timeline, loop the clip, and press and hold it to compare with the original.
- Copy the grade
- Copy a grade from one clip and paste it onto the next.
- Export
- HEVC 10-bit or H.264 8-bit in Rec. 709, at the original size, 4K, 1080p or 720p, at the clip’s frame rate or 60, 50, 30, 25 or 24 fps.
- Sound and metadata
- Sound is copied across untouched. Location, camera and date go along if you want them to.
Library & organizing
Every photo and clip in one place, sorted your way.
- Grouped by day
- Photos fall into days, and the date travels along in the bar as you scroll. Turn grouping off in Settings.
- Grid or list
- Switch between a grid of thumbnails and a list.
- Columns
- Pinch the grid to change the size: up to 5 per row on iPhone, 3 to 12 on iPad and Mac.
- Sorting
- Date Added, Date Taken, Name, Starred or File Size, each in both directions. Tap the active sort again to flip it.
- Filters
- All, Edited, Unedited, Starred, RAW, JPEG, Photos, Videos and Merged.
- Stars
- Star photos from their menu, as a selection, or with the S key on Mac and iPad. Undo works on stars too.
- Badges
- RAW, LOG, HDR and PANO marks, plus icons for starred, edited and only in iCloud.
- Select and act
- Press and hold to select, then star, export, merge, paste settings, download from iCloud or delete them together.
- Quick preview
- Look at a photo large without opening the editor, from its menu or with the Space bar.
- Photo info
- Dimensions, megapixels, file size and type, camera, lens, focal length, aperture, shutter and ISO. Clips show duration, frame rate, codec, color and audio.
- Map
- Photos with a location show a small map with coordinates, altitude and the direction the camera faced.
- Edit the location
- Search for a place, drag the map or type coordinates. Remove a location or restore the original. Exports carry the new one.
- Edit the date
- Set date and time, or shift them by 15 minutes or an hour for a camera clock in the wrong time zone. The file’s own date is one tap away.
- Copy metadata
- Copy a single value, the file name, the date or all metadata at once.
Import
Bring photos in from wherever they are.
- Photos library
- Pick photos and videos with the system photo picker.
- Files
- Open files on the device or in iCloud Drive.
- Clipboard
- Paste a copied image straight into the library.
- Share sheet
- Send photos, videos, presets and LUTs to masoc from any app.
- Drag and drop
- Drop files onto the library window.
- RAW formats
- DNG and Apple ProRAW, Canon CR2 and CR3, Nikon NEF, Sony ARW, Fujifilm RAF, Panasonic RW2, Olympus ORF, Pentax PEF and Samsung SRW, as far as Apple’s RAW engine supports the camera.
- Other files
- JPEG, HEIC, PNG, videos, .xmp and .masoc presets and .cube LUTs. Presets and LUTs land under Looks.
- No duplicates
- A photo that is already in the library is skipped.
- Your originals
- masoc keeps its own copy of every import, so editing never touches the source.
Export & history
Out in the format you need, and every step undoable.
- Formats
- HEIC, JPEG or PNG, or Original, the untouched source file.
- Quality
- 10 to 100 percent for HEIC and JPEG.
- Size
- Full size, or by long edge from 320 to 8,000 pixels, by megapixels from 0.5 to 60, or by percent. Never larger than the photo.
- Color space
- Display P3, sRGB or Adobe RGB.
- Metadata
- Location, camera and exposure, and date and time, each on or off.
- Destination
- Photos, Files or the share sheet.
- File names
- Keep the original name or choose your own, numbered in a batch.
- Batches
- Select many photos in the library and export them together.
- In the background
- A progress pill shows how far along it is and the time left, with Cancel. On iPhone a Live Activity follows along.
- Copy and paste edits
- Paste all of an edit or only the parts you choose, from white balance to frame. Crop, masks, retouch, blur and frame start switched off.
- Compare
- Press and hold the photo to see the original. On Mac and iPad, hold the Space bar.
- Undo and redo
- Everything, masks and tools included, for the whole session, even after closing and reopening a photo. A slider drag is one step.
- Reset all
- Remove every adjustment of a photo in one step, after a question.
- Free exports
- Your first three exports are free. Exporting an untouched original never counts toward them.
iCloud sync
Your library on every device, in your own iCloud.
- Off by default
- Nothing syncs until you turn it on in Settings › iCloud.
- Your private iCloud
- Everything moves through the private database of your own iCloud account. masoc has no server of its own.
- Categories
- Presets & Profiles, Photos and Videos, each on its own switch. Videos start off, since they take a lot of storage.
- Built-in looks stay
- The built-in profiles are part of the app and are never uploaded.
- Originals
- Keep All on this device, or Download When Needed: previews stay, and an original comes down when you open, export or merge it.
- Cellular data
- Background transfers wait for Wi-Fi unless you allow cellular data.
- Pause
- Pause syncing on one device and resume later, without losing anything.
- Free up space
- Remove downloaded originals that are safe in iCloud, or delete a category from iCloud altogether.
Mac & iPad
A native Mac app, and an iPad that works like one.
- Native on Mac
- Built with SwiftUI for macOS, not ported. It needs macOS 26 on a Mac with Apple silicon.
- Side panel
- Where there is room, the tools stand beside the photo, on the right or the left. iPhone in landscape gets it too.
- Menu bar
- File, Edit, View and Photo menus with import, export, undo, reset, merge and photo info.
- Editor keys
- C, M, B and R open Crop, Masks, Blur and Retouch. 1 to 4 pick a tab, the arrows switch photos.
- Sliders by keyboard
- Hold Option: up and down pick a slider, left and right move it, ten steps with Shift. Option-Delete resets it, Option-Tab changes the tab.
- Library keys
- Arrow keys move through the grid, Return opens, Space previews, S stars.
- Pointer
- Hover over a look to preview it, right-click a photo for its menu. On Mac, scroll with Option or Command to zoom.
- Settings window
- On Mac, Settings opens in its own window with Command-comma.
Help, feedback & privacy
Help when you want it, privacy all the time.
- Help & Tips
- Short topics on every part of the app in Settings, and a few tips that show up the first time you need them.
- Feedback
- Report a Problem, Suggest a Feature and Share Feedback open a mail to the developer, with app and device details filled in.
- Problem log
- Failed exports, imports, merges, sync and AI steps, crashes and freezes are noted on your device. Read, delete or send them yourself. They hold no photos, file names or places.
- No account
- No sign-up and no login.
- On your device
- Masks, depth, retouching and Smart Edit run on your iPhone, iPad or Mac. Nothing is uploaded, and it works offline.
- Appearance
- Follow the system, or keep masoc light or dark. The editing backdrop can be dark or light on its own. On iPhone and iPad, choose from six app icons.
- Storage
- See how much space the library takes, and clear the preview cache without touching photos or edits.
- Delete safety
- masoc asks before photos and videos are deleted, unless you turn that off.
Questions
- Is every feature free to try?
- Yes. Every tool is unlocked from the start, and your first three exports are free. After that, Unlock masoc costs $3.99 a month, $24.99 a year or $69 once, with Family Sharing.
- Do all features work on iPhone, iPad and Mac?
- Yes, masoc is one app with the same tools on each. Smart Edit needs a device with Apple Intelligence, keyboard shortcuts and hover previews need a keyboard or pointer, and app icons can be changed on iPhone and iPad.
- Which features work on video?
- Light, color, the tone curve, the color mixer, color grading, calibration, looks, LUTs, presets and crop. Masks, effects, retouch, censor, frames and background blur are for photos.
- Does any feature need an internet connection?
- No. Editing, every AI feature and exporting work offline. Only the optional iCloud sync, the maps in the photo info and the place search for a location go online.
- How current is this list?
- It lists what the current version of masoc ships, checked against the app in October 2026. Features still in development are left out until they are released.
Apple, Apple ProRAW, Apple Intelligence and Apple Log, Fujifilm and the names of its film simulations, Kodak, Portra, Ilford, Cinestill, Polaroid, Sony, Canon, Nikon, Panasonic, Olympus, Pentax, Samsung, DJI, ARRI and the names of their Log profiles, OpenEXR, Adobe, Lightroom and Camera Raw are trademarks of their respective owners. masoc is not affiliated with them.